Saturday, March 27, 2021

White Bean Vegan Pasta Sauce


 I decided to start using this site again for recipe tracking, mostly to note changes and to more easily been able to fine. This is a great vegan pasta recipe. It definitely came out a little grainy, but overall, it has great flavor and is very creamy.


 From Love&Lemons

Ingredients
  • 2½ cups small shell pasta or rotini
  • 1 tablespoon extra-virgin olive oil
  • 1 small yellow onion, chopped
  • brussel sprouts
  • lemon wedges, for serving
For the creamy vegan pasta sauce:
  • 1 can of white beans (1 1/2 cups)
  • ¼ cup vegetable broth or water, more as needed
  • 3 tablespoons fresh lemon juice
  • 2 tablespoons extra-virgin olive oil
  • ¼ cup vegan cheese or nutritional yeast
  • 1 garlic clove, minced
  • ½ teaspoon sea salt
  • freshly ground black pepper, to taste
Instructions
  1. Bring a large pot of salted water to a boil. Prepare the pasta according to the instructions on the package, cooking until al dente. Drain and set aside.
  2. Heat 1 tablespoon of olive oil in a large skillet over medium heat. Add the onion and sauté until soft, about 5 minutes.
  3. Roast in the brussel sprout halves and cook for another 3 to 5 minutes or until tender. Add the broccoli florets and leaves and a splash of water or vegetable broth. Cover and turn off the heat.
  4. Allow the broccoli to steam for 2 to 3 minutes or until tender but still bright green. Add the pasta, then stir in ¾ of the sauce, adding more broth if the sauce is too dry.
  5. Season to taste with more salt, pepper and lemon juice, as desired, and portion into bowls. Divide the remaining sauce onto each bowl. Top with the pine nuts and serve with lemon wedges on the side.

Sunday, February 28, 2016

Carmel Apple Smoked Gouda Galette

I love galettes. It's the crust. And in this case, it's the crust and the apples and the cinnamon.
And... I'll be honest the whole thing.
Plus galette sounds so fancy when it's really easy as pie (well, easier, really!)

When Chuck talks about the perfection of pear and gruyere in Pushing Daisies, I could be convinced that she was actually talking about this apple and gouda galette.  And her aunts have good taste in flavor combinations.
(Here's the trailer if you haven't seen it. It's a pretty cute show.)


"Energy" by The Apples in Stereo

Ingredients

For the crust
  • ¾ cups Bob's Red Mill Organic Unbleached All Purpose White Flour
  • 2 tbsp stone-ground yellow cornmeal
  • 1½ tbsp sugar
  • ½ cup grated smoked Gouda
  • 3.5 oz unsalted butter, cubed and chilled
  • 1-2 tbsp ice water

For the caramel
  • 1⅓ cups sugar
  • ¾ cup heavy cream
  • ¼ cup light corn syrup
  • 4 tbsp unsalted butter, cubed
  • ½ tsp kosher salt

For the galette
  • 1½ lb Pink Lady apples, peeled, cored, and thinly sliced
  • ½ cup light brown sugar

Directions

For the crust, in a food processor, pulse together the flour, cornmeal, and sugar to combine. Add in the smoked Gouda and pulse for another second or two. Add in the butter and pulse until the butter is in pea-sized crumbs. Add in the water, a tablespoon at a time, just until the dough starts to come together. Pat the dough into a flat disc and cover with plastic wrap. Refrigerate for at least 2 hours or overnight.

For the caramel, put the sugar into a heavy saucepan and heat over medium heat. In a separate saucepan, heat the heavy cream and corn syrup over medium low heat to a low simmer.
As the sugar warms, it will start to melt and turn golden. Stir it using a wooden spoon to evenly distribute the sugar as it melts, just until it is all melted and a medium amber color. Add the heavy cream mixture and remove from the heat. When it settles down, return to the heat and stir just until it comes together and is smooth. Add in the butter and salt and stir until smooth. Remove from the heat and pour into a heatproof jar to cool.

When ready to bake the galette, line a baking sheet with parchment paper. In a medium bowl, toss together the apples and brown sugar. Heat oven to 325.

Roll the refrigerated pie crust out into a 13-inch circle on a floured, cool surface. Arrange the apples on the dough, leaving a 1½-inch border around the edges. Drizzle ½ cup of the caramel over the apples.

Lift one side of the dough so that it partially covers the apples and press it down. Repeat around the galette, making 5-6 large pleats, pressing firmly so that they stick together. Refrigerate or freeze for 15 minutes.

Bake for 45-55 minutes, or until the crust is golden and the apples are tender. Let cool completely before serving.


Sunday, February 21, 2016

Gluten Free Vegan Waffles

There is nothing quite like waffles on a Sunday morning, and since my dad went vegan, he's been feeling a bit left-out of Sunday morning breakfasts. These waffles had him excited and munching away with everyone else. (Also, what is better than apple butter and blueberries? What a wonderful combination!)
These are the perfect hardy, crisp on the outside and soft on the inside waffles. 
And they're vegan. Does it get any better for midmorning Sunday breakfasts? 
I don't think so.

I used chocolate almond milk (didn't really have an effect besides giving a richer color) and used half honey and half maple syrup.
"Space Oddity" Performed by astronaut Chris Hadfield (written by David Bowie)
Adapted from Minimalist Baker

Ingredients

Waffles
  • 1 1/4 cup unsweetened almond milk + 1 tsp white or apple cider vinegar
  • 1/4 cup olive, canola or melted coconut oil
  • 1/4 cup agave nectar or maple syrup (or honey if not vegan)
  • heaping 1/2 cup gluten free rolled oats
  • 1 3/4 cups gluten-free flour
  • 1 1/2 tsp baking powder
  • pinch sea salt
Optional (flavors):
  • 1 tsp vanilla extract
  • 1/2 tsp cinnamon
  • 1 Tbsp flax seed meal
  • 1/4 cup dairy-free chocolate chips
  • 1/4 cup chopped bananas or other fresh fruit

Directions

  1. Combine almond milk and vinegar in a small mixing bowl and let set for a few minutes to curdle/activate. Then add olive oil, agave nectar or maple syrup and whisk. Set aside.
  2. Add dry ingredients to a large mixing bowl and whisk until well combined.
  3. Add wet ingredients to dry and mix until well incorporated. Test batter for sweetness and flavor. Add more sweetener or some vanilla extract if desired. 
  4. Let set for 5-10 minutes while your waffle iron preheats. (I use mine on the 4 setting.)
  5. Once waffle iron is ready, generously coat with non-stick spray and pour on about 1/2 cup of batter. Cook according to manufacturer instructions and then remove and place on a baking rack in a 200 degree oven to keep warm. Do not stack and instead keep them in a single layer to ensure crispiness remains.
  6. Serve immediately with desired toppings. Store leftovers in a freezer safe bag and reheat in the toaster. (Will keep in the freezer for up to a couple months, although they're freshest within the first couple weeks.)

Monday, February 15, 2016

Red Velvet "Mug" Cakes with Cream Cheese Frosting

I know. I finally went all pinterest with a mug cake.

Well, it had to happen eventually/

Spiral from putting the lid on. 

I was meeting up with someone just visiting for this weekend, so what is more travel-proof for the ride home than a mug cake?
(And it's delicious too!)


"I Think I See the Light" Cat Stevens

Adapted into mug cake from One Girl Cookies
Makes 4 mason jar mugs
Ingredients
2 cups plain whole-milk yogurt
2 teaspoons vanilla extract
2 teaspoons red food coloring
2 teaspoons distilled white vinegar
16 tablespoons (2 sticks) unsalted butter, at room temperature
3 cups sugar
4 large eggs
4 cups all-purpose flour
2⁄3 cup Dutch-processed cocoa powder
2 teaspoons baking powder
1 teaspoon baking soda
1 teaspoon table salt
Cream Cheese Frosting
  • 4 oz cream cheese, at room temperature
  • 4 tablespoons (1/2 stick) unsalted butter, at room temperature
  • 1⁄8 teaspoon table salt
  • 1 teaspoons vanilla extract
  • 2 1/4 cups (1/2 lb) confectioners’ sugar, plus more if needed

Directions
Preheat the oven to 350°F. Prepare four mason jar mugs by greasing them with cooking spray
In a medium bowl, combine the yogurt, vanilla, food coloring, and vinegar. Stir well.
In the bowl of an electric mixer fitted with the paddle attachment, beat together the butter and sugar on medium speed until light yellow and fluffy, about 3 minutes. Add the eggs one at a time and mix for 1 minute.
In a separate bowl, whisk together the flour, cocoa powder, baking powder, baking soda, and salt. With the mixer running on low speed, mix in a third of the flour mixture and half of the yogurt mixture. Add another third of the flour mixture and all the remaining yogurt mixture. Remove the bowl from the mixer, and fold in the remaining flour mixture until fully incorporated. Pour the batter into mugs, filling halfway.
Bake, rotating halfway through, for 40 minutes, or until a cake tester inserted in the center of the cake comes out clean. Let the cakes cool in the pans for 20 minutes. Let cool completely over onto a wire rack.
Pipe cream cheese frosting over the top of the cake to fill the mason jar mug. Add sprinkles if desired.

Cream Cheese Frosting

In the bowl of an electric mixer fitted with the paddle attachment, beat together the cream cheese and butter on medium speed until soft and creamy, 5 minutes. Add the salt and vanilla, and mix for 30 seconds on low speed. Scrape down the sides of the bowl. With the mixer running on low speed, add the confectioners’ sugar. Scrape down the bowl, and then beat the mixture for 1 more minute. If the consistency is too soft for frosting the cake, add more confectioners’ sugar, a tablespoon at a time, until you reach the desired consistency.

Baked Chicken Boneless Wings with Orange Chili-Curry Sauce

I don't know why I don't make breaded chicken more often. Every time I do I always regret that I didn't make more. And this sauce only exacerbated that feeling!
It's too good!
Yes, I know it's been awhile, and a pretty crazy past few months.
I went on a trip over winter break (Turkey and Spain in a kind of whirlwind Islamic and Roman art tour that was absolutely amazing and so beautiful! And the food! I am all about mezes and tapas.)

And more news! I changed majors! I am now a chemistry major and loving every second. Design, while I met a lot of nice people (and don't worry, I still hang out with my DAAPers), was definitely not my cup of tea. Or my sauce dipped chicken ;)

The sauce has this spicy-sweet flavor that is perfectly balanced with the mildness of the chicken and breading.


"It's Alright" Matt and Kim

Adapted from Half-Baked Harvest

Ingredients

  • 1 pound boneless chicken tenderloins or breasts, cut into nugget-sized pieces or strips
  • 3/4 cup buttermilk
  • 1 1/2 cups Panko (or crushed corn flakes)
  • 2 tablespoons whole wheat flour or cornmeal

Orange Chili-Curry Sauce
  • 1 cup tablespoon orange juice
  • 1 tablespoon low sodium soy sauce
  • 2 teaspoons jerk seasoning
  • 2 teaspoons Thai red curry pate
  • 2 teaspoon of chili powder
  • 1/2 cup water
  • juice of 1 limes
  • zest of 1 orange
  • 1/2 cup fresh cilantro, chopped

Directions

Preheat the oven to 475 degrees F. Line a baking sheet with foil and spray or brush it with the olive oil.
Add the chicken to a large bowl and pour the buttermilk overtop. Mix well and set aside. In a shallow pie dish or large bowl add the Panko, whole wheat flour and a pinch of salt and pepper. Mix well.
Remove each piece of chicken from the buttermilk, and dredge through the crumbs, pressing gently to adhere. Place on the prepared baking sheet. Repeat until all the chicken has been used. Make sure not to crowd your pan, if necessary use two baking sheets. Spray each chicken "wing" with non-stick spray or a mist of olive oil. Bake for 10-12 minutes, then gently flip using kitchen tongs and spray the other side. Bake for 10-12 minutes more, then remove from oven. Reduce the oven temp to 400 degrees F.
While the chicken is baking make the sauce. In a small-medium saucepan, combine the orange juice, soy sauce, jerk seasoning, curry paste, chili powder, pinch of pepper and water. Bring the sauce to a boil and then reduce the heat. Simmer 5 minutes or until the sauce has thickened slightly. Remove from the heat and stir in the lime juice and orange zest and the cilantro.
Gently dip each piece of chicken into the sauce, draining the excess sauce back into the bowl. Place the chicken back on the pan and repeat until all the chicken is coated in the sauce. When ready to serve, place the pan of chicken back in the oven for 5 minutes to warm throughout and to help the sauce coat the chicken.
Serve with any extra sauce for dipping.


Sunday, November 15, 2015

Apricot Granola

Sweet and salty and crunchy make the perfect snack. Plus dried apricots are just the best. 

This also makes are really great present wrapped up in a jar. 

"Tutti Fruitti" Little Richard 


Adapted from One Girl Cookies

Ingredients

  • 4 1/2 cups old-fashioned rolled oats
  • 1 cup slivered almonds
  • 1/2 cup unsalted sunflower seeds
  • 3/4 cup unsweetened shredded coconut
  • 1/2 teaspoon table salt
  • 1/2 cup honey
  • 1/4 cup canola oil
  • 1 1/2 teaspoons vanilla extract
  • 3/4 cup dried apricots, chopped

Directions:

Preheat the oven to 350 degrees. Spread the oats out on two baking sheets, and toast them in the oven for 14 minutes. Then transfer them to a very large bowl and let them cool.
On a baking sheet, toast each of the following ingredients separately: the almonds for 10 minutes, the sunflower seeds for 8 minutes, and the coconut for just 1 minute. Add the toasted nuts and coconut to the oats, and stir. Reduce the oven temperature to 225 degrees.
Add the salt, honey, oil, and vanilla to the mixture in the bowl, and mix thoroughly. Divide the mixture between the two baking sheets, and bake for 2 hours. Remove the baking sheets from the oven and let the granola cool for 20 minutes.
In a large bowl, combine the apricots with the baked ingredients. Allow the granola to cool to room temperature. The granola will keep in an airtight container for up to 2 weeks.


Thursday, November 12, 2015

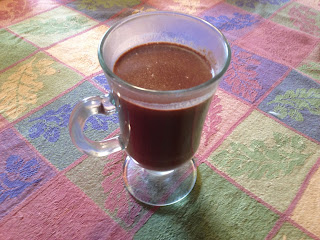
Butterbeer Hot Chocolate

We had no classes on Wednesday for Veteran's Day/Armistice Day, and so for the first time this semester I had enough time and will to go out and buy a broom and go to a quidditch game. And I am totally regretting that I didn't go until now. So much fun! If you're in college and you haven't played or if your area has an adult league, highly recommend it. Seriously, running around with a broom between your legs is ten times more fun than any other sport could ever hope to be. It's like soccer, dodgeball, and football combined.

And on that related note, it was also freezing cold and raining and the miserable, slow descent into winter with the so cold but just above freezing rain and sleet is continuing here, so it's time to bring out the hot chocolate. And what better way than with butterbeer?


If you make the original recipe (linked below), it'll taste a lot like the Butterbeer Cupcakes I made a few weeks ago. And I did try it with the pumpkin, but I couldn't get past the grainy texture, so I revised it a bit and eliminated the pumpkin and cut back on the cinnamon.

Still delicious :)  


"You and I" Ingrid Michaelson

(I'm going to visit a friend this weekend and this song always makes me think of her.)

Adapted from Half-Baked Harvest

Ingredients

  • 4 1/2 cups whole milk or unsweetened almond milk
  • 1/4 cup cocoa powder
  • 1/2 teaspoon ground cinnamon
  • 6 ounces milk chocolate, chopped
  • 1/3 cup butterscotch sauce (recipe below)
  • 1 tablespoon vanilla extract
  • 2 tablespoons butter
  • 2 tablespoons bourbon (optional) (consider it your very own firewhiskey ;) )
  • For Butterscotch Cream
  • 1 cup heavy whipping cream
  • 2 tablespoons butterscotch sauce (homemade recipe below)
  • 1 vanilla bean, seeds removed or 1 teaspoon vanilla extract
  • For Butterscotch Sauce
  • 4 tablespoons (1/2 stick) unsalted butter
  • 1/2 cup packed dark brown sugar
  • 1 teaspoon kosher salt
  • 1/2 cup heavy cream
  • 1 teaspoon vanilla
  • 1 tablespoon bourbon (optional)

Directions

Add the milk to a large heavy bottomed pot. Add the cocoa powder, cinnamon, milk chocolate, butterscotch sauce, vanilla, butter and bourbon (if using). Place the pot over medium low heat until the milk is scalding, but not boiling. Be sure to stir the pot often to make sure nothing is sticking to the bottom and burning.
Meanwhile, make the butterscotch whipped cream. Add the cream to a large mixing bowl and whip until stiff peaks form. Add the vanilla bean and whip until combined. Stir in the butterscotch, leaving streaks in the whipped cream. Keep in the fridge until read to serve.
Once the hot chocolate is steaming, ladle into mugs and dollop with cream. 
!For Butterscotch Sauce
Melt the butter in a small sauce pot. Add the brown sugar, heavy cream and salt. Bring to a boil and then reduce heat to medium. Boil for 3 to 4 minutes. Remove from heat and stir in the vanilla and bourbon, if using.